Call today


There are so many types of stabilizers on the market today that it can be a problem figuring out what you need for your machine embroidery. This article covers the major types of stabilizers available and what materials they work best with. It gives you tips for working with difficult to hoop materials and some hints on hooping.
The major stabilizer categories covered here are:
There are many companies making stabilizers and their products have different names. For example, a water-soluble stabilizer made by Sulky is called Solvy while Floriani call theirs Wet N Gone. Marathon just calls theirs water-soluble stabilizer. Very confusing! Ultimately, most of the hundreds of stabilizer on the market can be grouped into these four categories and they will cover almost all your stabilizer needs.
Stabilizers come in different ‘weights’, e.g. light, medium and heavy and you select the weight that is right for your project. Tear-away and cut-away stabilizers often come in both black and white so you can match the colour to the material in your project. Most excess stabilizer is removed after the embroidery is completed and it is how it is removed that determines which category the stabilizer belongs to. So a tear-away stabilizer can tear in two or more directions and the excess is simply torn away after embroidering. The bit under the embroidery remains and adds more stability to the piece during use.
You must use a stabilizer when machine embroidering as it supports the fabric during the embroidery process and stops it slipping and distorting. You cannot produce a well-embroidered piece without using stabilizer.
And it is important to match the correct stabilizer to the fabric and to the design. If you are using a cotton material with a medium dense design, try using two layers of a lightweight tear-away. Some embroiderers prefer to use one layer of a medium to heavyweight tear-away stabilizer instead. There is no right answer – only guidelines - and you will need to experiment with a test piece for each new project.
1. Choose the right type of stabilizer for the fabric. Generally:
· Tearaways are used for woven fabrics such as cotton and denim as woven fabrics are more stable and don’t move as much in the hoop. Some tear-away stabilizers have an adhesive on side that is fused (ironed on) to the back of the fabric.
· Cutaways are used for stretch and knit (non-woven) fabrics as these are unstable fabrics and need the extra stability of a cutaway – which is more resistant to needle penetrations.
· Washaways are used whenever you want to remove the stabilizer completely after the piece is embroidered, e.g. free standing lace - but the fabric must be washable. Also used for toppings on napped materials.
· Topping film is used on top of material that has a high pile, e.g. towels, velvet, fleece and some knits. If you don’t use a topping, the stitches sink into the material and bits will poke out through the embroidery stitches. These are called ‘pokies’ and are to be avoided.
2. Choose the right weight of stabilizer for the fabric. Now we’re at the difficult part as there are no rules for this complex issue. You don’t just match a heavy weight stabilizer with a heavy weight material and the same for lightweight materials. Nor does it work by putting opposites together, e.g. putting a lightweight stabilizer with heavy material. Every combination of stabilizer and material has its own unique requirements. Take organza as an example. This is a very lightweight material that doesn’t stretch so it is stable. A heavyweight stabilizer would not work on such a lightweight fabric so a lightweight stabilizer would be the best choice. The fabric is also slippery and I would choose a lightweight stabilizer that provided the best protection against slippage – a fusible would be good. I would start with one layer of lightweight stabilizer and if there was any slippage, I would add another layer.
Fabrics that have a little or a lot of stretch are less stable than non-stretch fabrics so they need greater stabilization and possibly a heavier weight stabilizer or a fusible stabilizer.
The weight of the stabilizer ultimately comes down to stability and you need to work out what combination of stabilizer and material provides the best stability for the density of the design (see below). This is why you must do a test piece – even several test pieces to get it right.
3. Match the stabilizer to the design. The denser the design, the more stability has to be provided by a stabilizer to prevent distortion and puckering. A redwork design is usually low density (not many stitches in a given area) so does not need to be stabilized as much as a dense design that has multiple layers of thread in all or part of the design or a lot of fill stitches in a given area. Each time the needle penetrates the fabric and stabilizer, it leaves a hole. So the denser the design, the more needle penetrations there will be. Cut-away stabilizers are less resistant to needle penetrations than tear-aways (which is why cut-aways have to be cut and not torn away) and provide more stability during the embroidery process and afterwards, during normal wear and tear.
Free-standing lace is usually very dense so two or three layers of water soluble stabilizer are required to minimise distortion.
4. Use the least amount of stabilizer as possible. Start your test piece with one layer and, if there is puckering or the design is all over the place (outlines and registration marks don’t line up), add another layer. The thicker the stabilizer, the bulkier the finished piece will be.
5. Hoop the stabilizer properly. The stabilizer should be completely hooped with the material and have a minimum 2 cm border outside the hoop to keep the embroidery stable. Having said that, if I’ve started embroidering and I don’t feel that I’m using enough stabilizer, I’ll slip an extra layer between the hoop and the machine.
6. Use adhesive stabilizers with care. Tear-away stabilizers with fusible backings that are ironed on to the back of the material are often used to prevent the material and stabilizer separating (however slightly) during the embroidery process. Again, there is no wrong or right answer – some people swear by them other people won’t let gums and adhesives near their machine. See Hoopless Embroidery for Difficult Items and Materials, below.
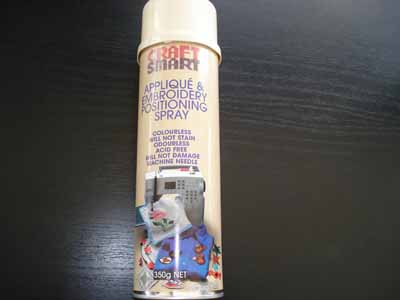
If you like the idea of adhering the fabric and stabilizer together but don’t have a fusible stabilizer, you can use a spray adhesive – this is particularly useful when you want to adhere a cut-away stabilizer to the fabric. This adhesive must be made especially for material and NEVER spray it near the machine.
The embroidery is finished and it is time to remove the stabilizer. How you do it depends on the type of stabilizer used.
Tear-away stabilizer
Hold the embroidered section with one hand and tear the paper away from the embroidery – never into the embroidery as this will weaken the edges and may damage the design. If I don’t need to remove the stabilizer from the hard-to-access places, then I leave it there. It will provide support for the item during normal wear and tear. If it all has to come out, I carefully use small curved-tipped scissors and tweezers.
Cut-away stabilizer
This stabilizer has to be cut away and cannot be torn. Use the small curved-tip scissors to cut around the design. I put my finger between the stabilizer and the material and run the scissors along my finger to avoid cutting the material. Leave a small margin, if possible, to protect the edge of the design.
Water-soluble stabilizer
There is a tendency for the residue from water-soluble stabiliser to remain in the embroidered piece making the piece stiff and inflexible. This may be what you want if you are making a doily or lace segments for a bowl and you need the rigidity. Otherwise, you need to rinse as much of the stabilizer away as possible.
How to rinse out water-soluble stabilizer:
Silk, velvet, leather, suede and corduroy are just some material that shouldn’t be hooped –the pressure of the hoop causes a hoop ‘burn’ that cannot be removed so these materials are embroidered using the hoopless embroidery technique. This means that only the stabilizer is hooped and the material is stuck to the stabilizer using double-sided tape or spray on adhesive.
How to use double-sided tape for hoopless embroidery:
How to use spray on adhesive for hoopless embroidery:
Use either of these two methods to embroider towels and items that can’t fit into a hoop, e.g. the edge of a napkin and collars.
These are only suggestions and you must test your own combination.
But you don’t have to stick to these guidelines and I often use a cutaway on cotton material when I’m embroidering a dense design. The frequency and type of use also impacts on a garment, e.g. I would use a cut-away for a cotton garment that will receive a lot of machine washing as it will provide more protection against wear and tear.
You will not get a good result if you do not hoop the stabilizer and fabric properly. The material and stabilizer must be smooth and wrinkle free and must not be loose. Any loose material will be taken up by the embroidery and will result in puckering and distortion.
Most embroidery hoops have an inner and outer hoop with a tightening device such as a screw. The material is sandwiched between the inner and outer hoops.
The tension in a tightened hoop is not evenly distributed and will be looser at the screw area. Therefore, it is necessary to tighten the screw then remove the inner hoop to distribute the tension and re-hoop.
How to hoop material:
Never stretch the fabric once it has been hooped. It will just relax back into place after you remove the hoop and will result in puckering.
Hooping knits and other stretchy items can be difficult so you may want to use a fusible stabilizer or a spray adhesive first.
And lastly - only ever carry your hooped fabric by holding the hoop itself, otherwise you will stretch the fabric.
Here are other great tips from Embroidery Library.
Beautiful Marathon Embroidery threads have been available in Australia for more than 26 years now, supplying commercial embroiderers and people who simply love creating beautiful designs with machine embroidery at home.