Call today


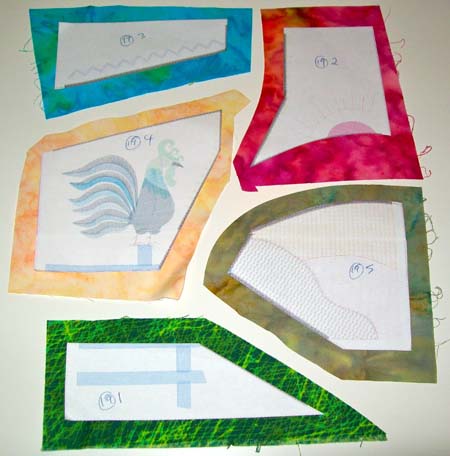
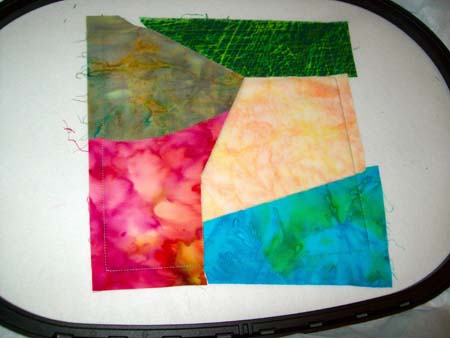
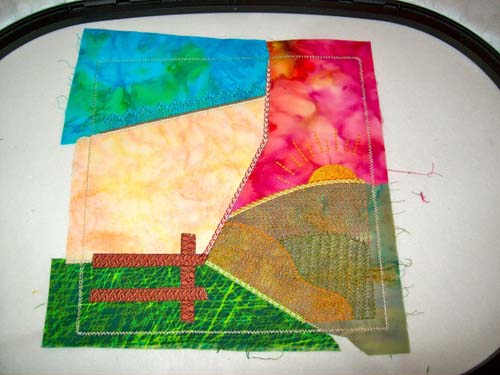
You can make appliqué blocks decorated with beautiful embroidery all in one step within your embroidery hoop. This tutorial uses a crazy quilt block to demonstrate how easy and fast it is to create a fun block that can be joined with others to make a crazy quilt.
This tutorial covers some of the basics of appliquéing in the hoop but each designer creates their designs differently so you cannot religiously follow the steps detailed here for all designs. I have written this tutorial to show you what is possible with your embroidery machine and to encourage you to create beautiful and fun things.
Follow these instructions to create this fun quilt block entirely in the embroidery hoop.
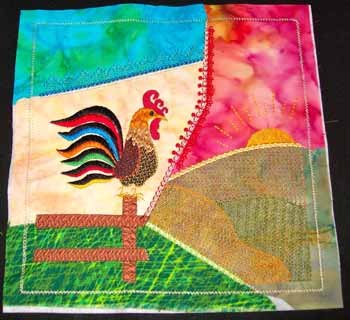
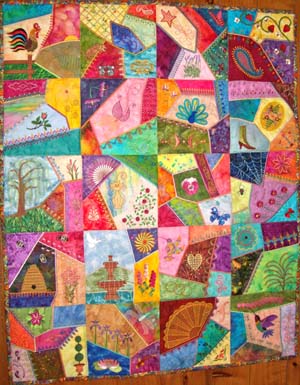
These blocks can be joined together to make a quilt or wall hanging.
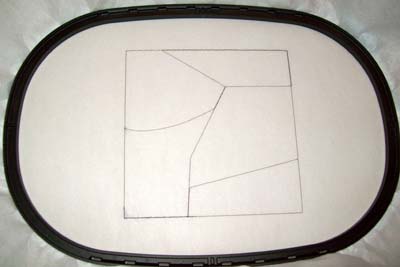
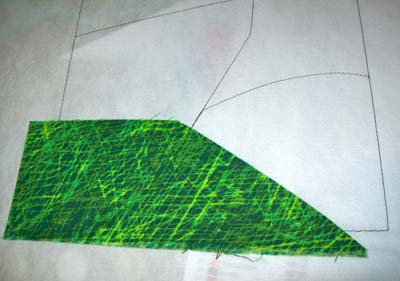
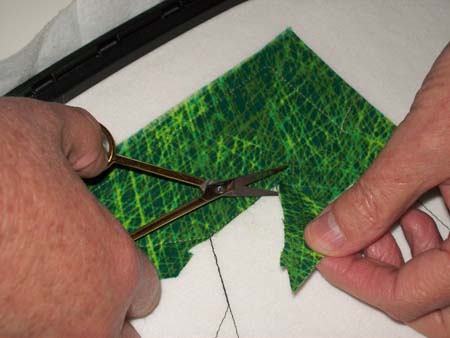
Appliqué in the hoop has many variations but it is basically where the embroidery machine appliqués pieces of material onto a background – usually a stabilizer. The machine stitches the outline of the block (including the placement lines for each piece of fabric) onto the hooped stabilizer. Individual pieces of material are laid over the outlines, stitched, then cut into the right shape. The machine joins the fabric together (usually with a satin stitch) then embellishes the block with embroidery. The result is an appliqué block that has been completed using only your embroidery machine.
There are five things you need to create an appliqué block similar to the crazy quilt block demonstrated here:
5. A small pair of scissors with a thin, sharp point. This is required for cutting away the excess material close to the sewing line and your curved embroidery scissors will not work here.
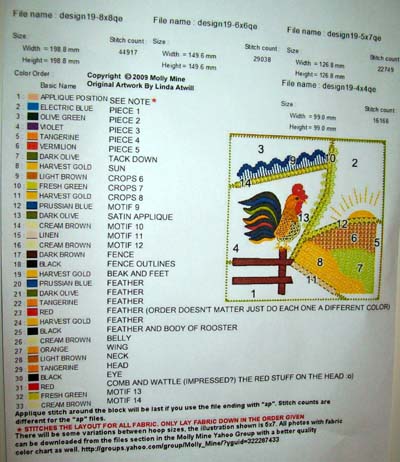
There are a lot of thread colours at the beginning of the block but it is not necessary for you to change the actual thread. They are called thread stops and are put there by the designer to stop the machine so you can place, or trim, the appliqué piece. Therefore, it is not necessary to change your thread each time there is a thread stop as this thread will not be seen. In the steps for embroidering the appliqué block (below), it is not necessary to change the thread colour until step 8.
Written by Elaine Raahauge – business writer and home embroiderer
Question: I have viewed your tutorial on Crazy Quilting. Can you please help me out as I make my quilts as "quilt as you go" so would I be able to use the embroidered designs for crazy quilts as a quilt block - ie top, wadding and backing in the all in one go? I am very interested in the design in the hoop crazy quilt, but it will not work if maybe the 'sandwich' was too thick? The designs in the hoop are so decorative that there would be little or no space to quilt in the traditional way - ie do the top and then layer. (Jenny N. from UK)
Suggestion: I embroidered my crazy quilt pattern directly onto a hooped cut-away stabilizer - laying down the fabric over the stabilizer, as required. Once all the blocks were completed, I removed the stabilizer from the seam line only then joined the blocks together with a quarter inch seam. I laid the quilt top over the backing and connected the two together by zig-zagging over the seam lines (from the front) I did not quilt the quilt as it doesn't need it and there is nowhere to quilt anyway.
I will try and explain why I did it this way and give you other options.
You can use anything as the base for the block. I chose the cut-away stabilizer because it is easy to hoop and it provides a solid foundation to build on. You could hoop a tear-away stabilizer and baste a layer of wadding (not too thick) over the stabilizer and lay the fabric directly onto the wadding. I have never hooped wading by itself and have no idea if this would work well. I would be worried about it stretching during the embroidering. Therefore, I recommend you use a stabilizer base with it. You can remove the tear-away stabilizer afterwards, if you want.
You can even use a layer of material as the base and then baste the wadding onto that. You may not even want to use wadding as it is really not required (as there is no quilting to enhance). If I was doing this again, I would hoop a layer of flannel and lay the applique fabric directly onto this. No matter what base material you use, the quilt will be stiff as there is so much decorative stitching on the blocks. If you use wadding, use the thinnest possible.
There is no way you would want to include the quilt backing in the layering in the hoop as you wouldn't want the back of the embroidery to be visible in the finished quilt. The backing has to be added after the embroidery is finished.
This is really a wall hanging rather than a quilt and is quite small. I have a large embroidery hoop and my blocks are 200mm x 200mm. If you don't have this sized hoop, you can make smaller blocks to fit your hoop. Therefore, you won't have a large and cumbersome quilt to fight with.
- Elaine Raahauge
Beautiful Marathon Embroidery threads have been available in Australia for more than 26 years now, supplying commercial embroiderers and people who simply love creating beautiful designs with machine embroidery at home.