You can make beautiful free standing lace (FSL) using your embroidery machine. This is lace that is meant to stand alone and is not embroidered onto other material (except possibly organza – more about that later).
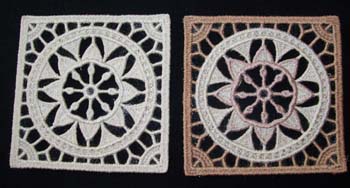
FSL Set 1 – Hatched in Africa - used with the kind permission from the designer.
Using FSL
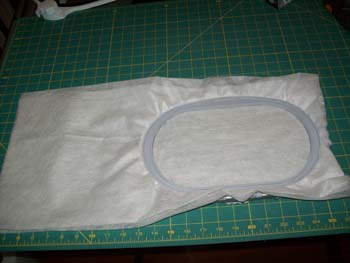
The sample squares I made for this tutorial can be joined together to make a doily or even a tablecloth. You can make FSL to put on the edge of sheets or a tablecloth (why not make a tablecloth with cutwork corners and a lace trim). Other uses include Christmas ornaments, bookmarks, lace bowls or you can appliqué the lace to clothing. You can make beautiful 3D items, such as a flower or butterfly, by hooping a layer of netting or organza with the water-soluble stabilizer.
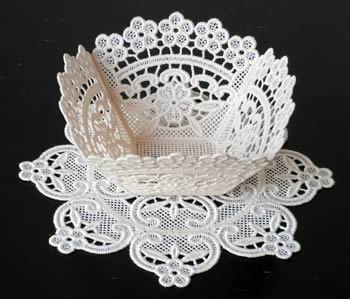
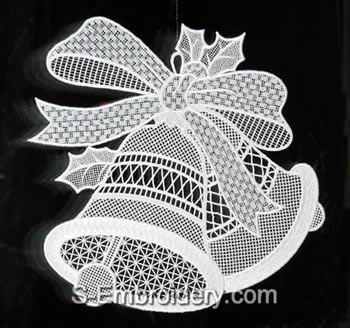
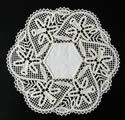
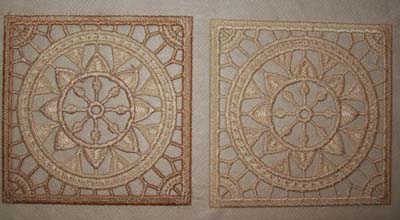
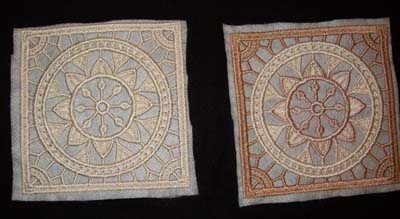
Samples of FSL
These items show what can be made using the FSL technique. These designs are digitized by Stanislava Krachunova of S-Embroidery and these samples are shown with the kind permission of the designer.
Lace edging for a tablecloth, doily or bed sheet.
Bowl and matching doily
Decoration
Doily
What you need to make FSL
There are only four items you need to make FSL:
The most important thing is the right type of design – it must be digitized as FSL. If you try to embroider a lacey looking design that is not FSL, it will fall apart when you remove the stabilizer. The right designs will often have FSL as part of the design name.
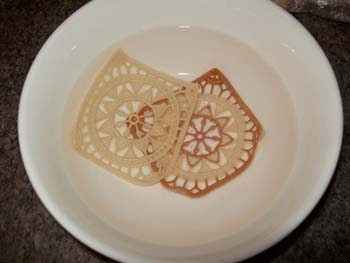
Water-soluble stabilizer is used as the foundation for the embroidery and it is washed away leaving – well, lace.
Marathon rayon thread is perfect for making FSL and you can use one colour or several – it all depends on the look you are after.
Matching bobbin thread if the back of the lace will show. I use the same rayon thread in the bobbin that I use for the design.
Getting ready to make FSL
Read the instructions that come with the design.
Hoop two to four layers of water-soluble stabilizer. These designs are usually dense and need a lot of support. If you are making a lot of small pieces of FSL, it is more efficient (and less expensive) to hoop an extra long length stabilizer and move the hoop along the stabilizer as each hooping is completed.
Use your machine or embroidery software to fit as many designs into the hoop as possible.
Download your design to your machine.
Select your threads.
Pre-wind your bobbins or buy pre-wound bobbins.
Creating the FSL
Embroider the FSL design directly onto the water-soluble stabilizer.
Unhoop the completed embroidered pieces and cut away as much of the water-soluble stabilizer as possible.
Tidy up the embroidered piece by removing thread ends and jump stitches. Anything on the back of the embroidery will show when the stabilizer is gone.
Wash away the water-soluble stabilizer. This can take some time but the more you remove, the softer the finished FSL will be. I rinse the pieces several times in a bowl with fresh cold water then leave to soak in fresh water overnight. If you are making a bowl or other 3D item, you’ll want to keep as much of the stiffness as possible so just rinse away the stabilizer.
Dry the FSL flat on paper towels. This can take one or more days.
Iron the FSL upside down on a towel spread over the ironing board. The towel gives the lace something to sink into and prevents it from being flattened. All embroidered items should be ironed this way.
Joining FSL
Join the finished pieces of FSL (on the wrong side) by butting them together and using invisible thread and a zigzag stitch on your sewing machine. You can also use the same colour rayon thread to join the pieces.
More help available
Go to s-embroidery.com for more tutorials on FSL including how to attach the lace to material to make this beautiful table runner. There are free designs that you can download – including a FSL Christmas stocking.
Written by Elaine Raahauge - business writer and home embroiderer